

How To Lock and Password Protect Files, Folders On Mac
Macs and Windows PCs are inherently unlike in how the office, despite them existing to serve basically the same purpose. When you start using a Mac, for example, you immediately realize that there's no pick for Cut, just rather just Re-create, and if you want to movement something to another location, you need to follow a slightly different process. One such difference is protecting your personal data. While Macs are more secure than Windows-based computers past default, there might be scenarios where you're non concerned about protection against malware simply instead password-protecting (or encrypting) your personal files, making them inaccessible to everyone besides yourself. This tin can be data like financial statements, credit menu information, photos or pretty much anything. Well, you can easily do that on a Mac.
This has to practice with the mode OS X handles file storage compared to Windows. In Windows, yous get encryption options, certain, but if yous desire to just password protect a folder, there's no piece of cake style to practise that. Yous will have to employ a 3rd-party software to create a secure vault. OS X, however, allows you to do that by default, although the process is not that straightforward. That'southward the whole point of this guide – to bear witness you how you can secure a binder on a Mac without using an external tool.
We will handle this via two different approaches. First method assumes that you have all the information that needs to exist protected already in i binder and will piece of work with but that. The 2nd method will lead yous to create a secure vault (a deejay prototype, to be specific) where you lot can put your personal data as needed. Both these methods will make utilise of OS X's built-in Disk Utility.
How To Password Protect Whatever Folder On Mac
For the sake of this guide, I have created a folder on my desktop called My Personal Stuff on my desktop. That's what we will exist working with.
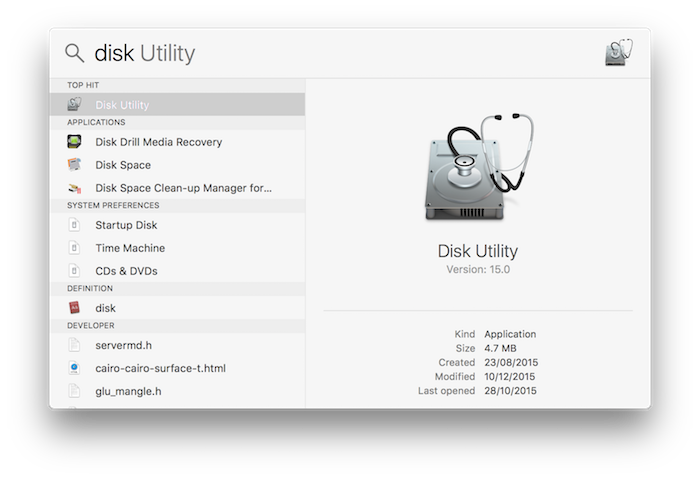
To begin, launch Disk Utility . You can either do that via the Spotlight shortcut (hit Command + Infinite and type Disk Utility, and hit Enter), or you can find the utility in the Others folder on your Mac's Launchpad.
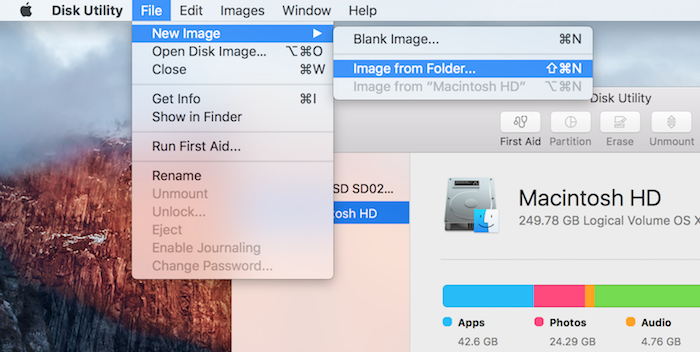
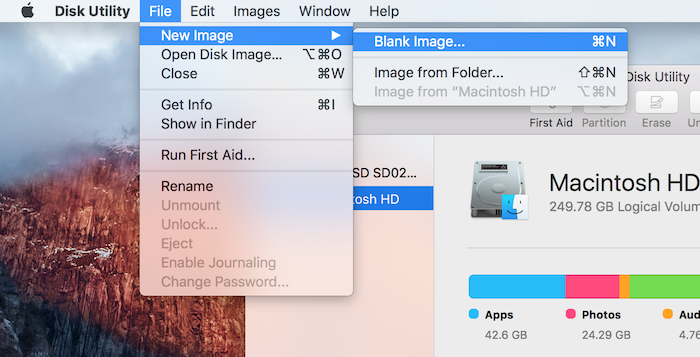
Within the Disk Utility, navigate to the File carte from menu bar and select New Image > Paradigm From Folder.
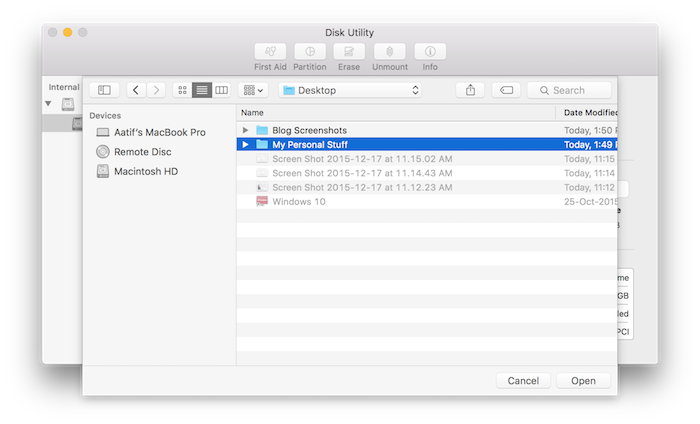
You will at present be asked to select the folder that you lot want to make a deejay image out of. Select your desired folder.
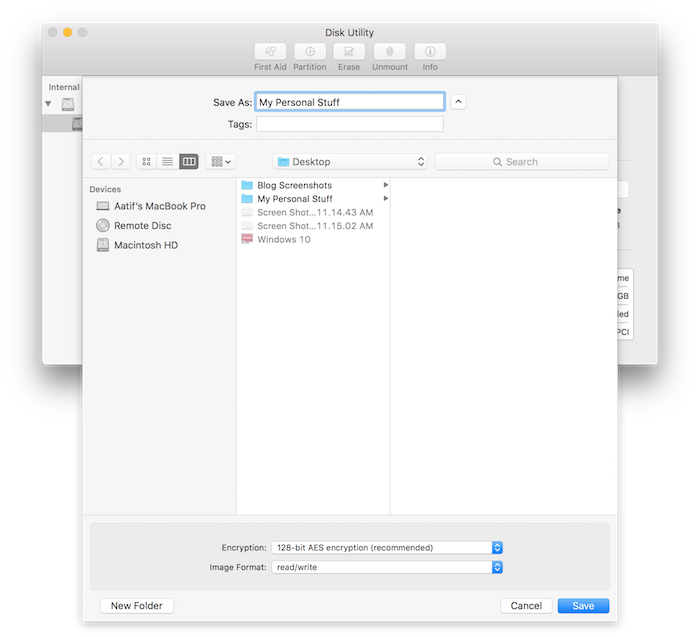
The next screen will inquire you to select a name for your deejay paradigm, the location where you want to save it, and all the usual parameters. At the bottom of this dialog, at that place are the two options that matter the nigh: Encryption and Image Format. This is where yous have to pay the near attention. For Encryption, select 128-flake AES encryption (recommended) , and for Paradigm Format, pick read/write .
Delight note that when you select the encryption choice, you volition be asked to enter a countersign and verify it. Remember this, because if y'all forget this password, there is no mode to access those files again.
Once you lot hitting Save , the cosmos process will begin. Depending on the size of your folder, it tin can take some time and then be patient.
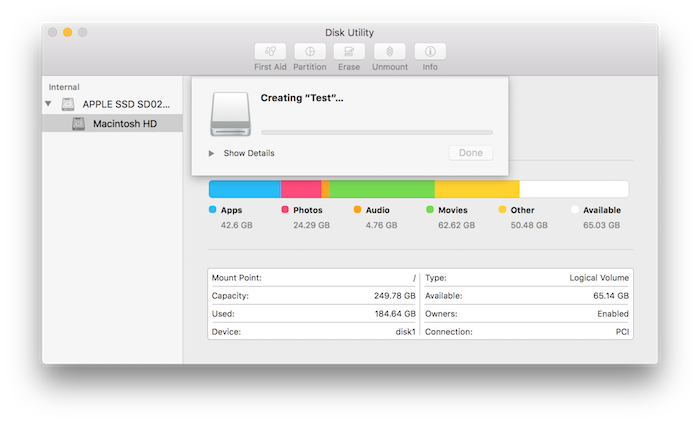
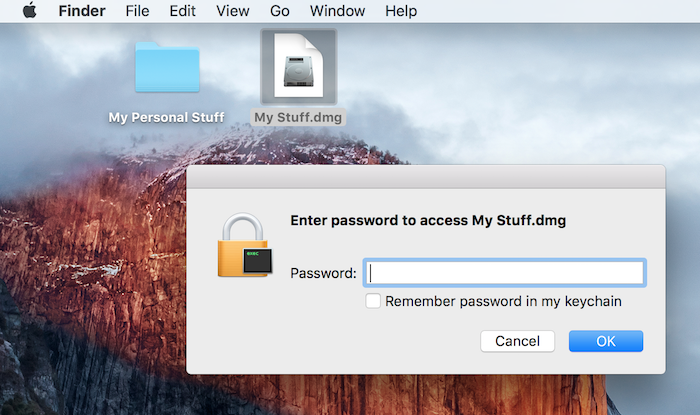
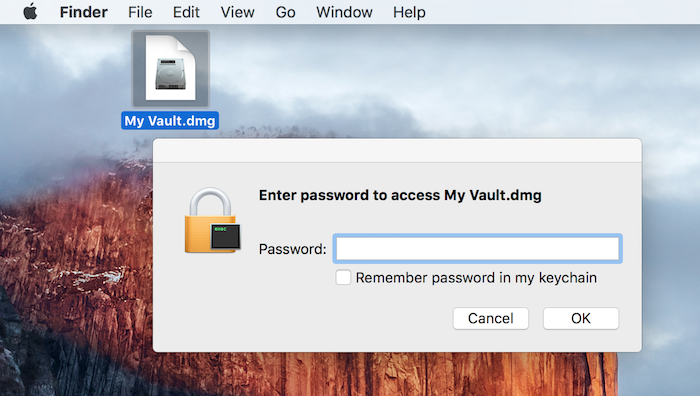
When you get the successfully completed message on Disk Utility, the process is basically complete. You will detect a new .dmg file in your selected location which is your encrypted folder. Attempt to mount it and you volition be asked to enter the password.
Delight ensure that you lot practice not allow for this password to be remembered in Keychain , every bit that will defeat the whole point of having this folder in the first place. Once you're satisfied, you can even delete the original folder and proceed working with the protected disk image. Any y'all had in this disk image is not password protected, and you tin fifty-fifty add more than data to it as you like.
Once you're done using your password protected binder, don't forget to unmount to restrict access. That's all there is to it.
How To Create A New Password Protected Binder On Mac
Principally, this method follows the same practise as the first one, but information technology differs in a number of creation parameters, mainly with respect to how y'all approach the password protected folder. In the showtime method, you were using an existing folder and encrypting that; over here, we'll prove yous how to create a new, empty storage vault (folder) with a specified file to store pretty much anything.
To begin, launch Disk Utility . Yous can either practise that via the Spotlight shortcut (hit Command + Space and type Disk Utility, and hitting Enter), or you can find the utility in the Others folder on your Mac'due south Launchpad.
Within the Disk Utility, navigate to the File menu from menu bar and select New Image > Bare Epitome.
You will exist presented with a dialog window offering a number of options. Specify the name of your vault, the size (pay attending to this; you volition not be able to change it afterwards), epitome format, encryption, partitions etc. Please note that format should be Os X Extended (Journaled) , employ 128-bit AES encryption , partitioning is Single sectionalization – Apple Sectionalization Map and image format is read/write disk epitome . Equally earlier, selecting the encryption option volition ask y'all to provide a password, along with all the associated options.
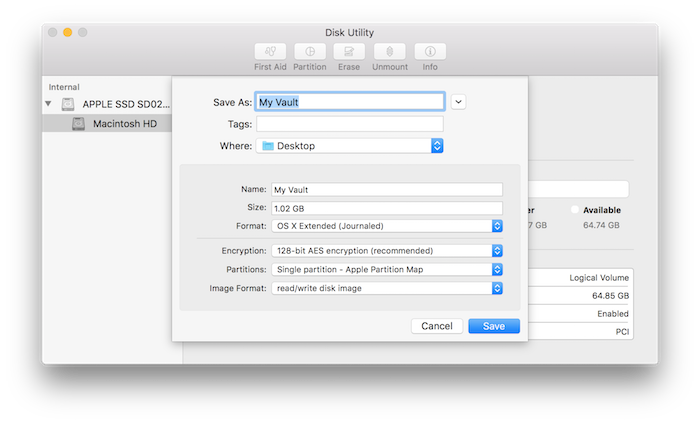
In one case you striking Relieve , the encrypted deejay epitome in your specified size and other parameters will be created in the selected location. Note that for the first time, this disk image volition be automatically mounted. At this point, you can motion whatever data that you need to protect to this deejay image.
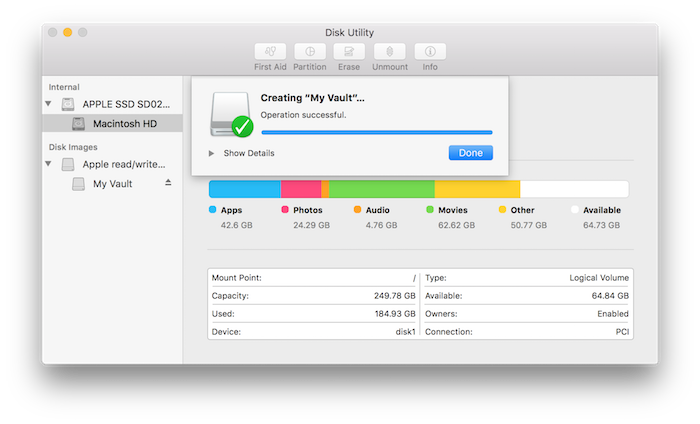
In one case you unmount this image, the next attempt at mounting it will throw a password prompt. Make certain you don't allow for remembrance of the password in Keychain , and you're all set.
At present yous have a password-protected vault that you can use to store your personal/confidential data upward to the size that you lot specified during creation of this .dmg file. To store or access data, mount the disk image, provide the specified password and it volition announced in Finder as a mounted drive. Copy whatever y'all want to this location and once you're satisfied, unmount it to restrict access again.
Come across ALSO: How To Uninstall Programs And Apps On Mac
That'due south all there is to it, pretty much. At that place are third-party solutions out at that place that volition let you lot to do the same affair, simply if you lot have a built-in feature, I would recommend using that over an external software any mean solar day. Furthermore, the method is pretty straightforward, and fifty-fifty a novice user can hands protect their precious files and folders on a Mac past following these steps. Do go on in mind that the disk images created this way will be recognized by a Mac only; other OS volition either non read them at all (like Windows), or will ask for password if you endeavour on some other Unix-based organization.

Source: https://beebom.com/lock-password-protect-files-folders-mac/
Posted by: ellisatrace.blogspot.com
0 Response to "How To Lock and Password Protect Files, Folders On Mac"
Post a Comment